Wednesday, March 30, 2011

Daffodils in a Jar {a new small painting}

20110324 daffodils in a jar 6x5
Daffodils in a Jar
{6" x 5" (15.2 x 12.7 cm) – oil on linen panel}  SOLD

Hello,

With daffodils blooming everywhere I cannot help but paint them :)

Spring has arrived but in fits and starts... Have you been having a nice one so far?

Monday, March 28, 2011

Anatomy of the Torso {a workshop taught by Robert Liberace}

Hello,

This weekend I attended a workshop at the Art League taught by Robert Liberace. The focus was on the anatomy of the torso, and we covered a lot of ground over the three days. Looking at all the major muscles that make up the torso and their points of origin and insertion.

The workshop was organized with both lecture periods and time to draw. Each day we would focus on specific muscles and the pose we drew would include these muscles.

Here are the drawings Rob drew as demonstrations, totally amazing...
RLiberace Anatomy of Torso wkshop - Robs dwg 1
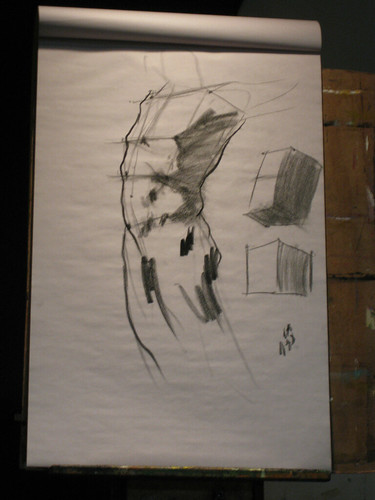
.first drawing of the workshop, where he was emphasizing the basic forms and structure of the torso. Drawn on newsprint with charcoal.

RLiberace Anatomy of Torso wkshop - Robs dwg 2
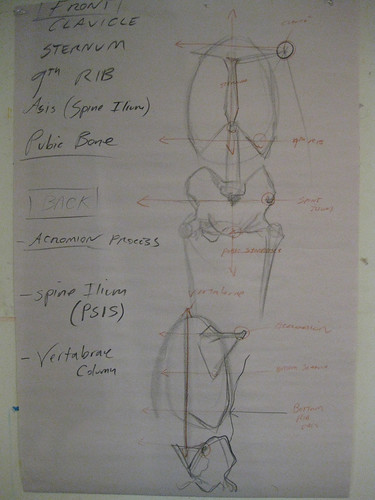
.a breakdown of the significant bony points to be on the look out when drawing the human figure. Drawn on newsprint with charcoal.

RLiberace Anatomy of Torso wkshop - Robs dwg 3
.drawing from the second day focusing on the external obliques, the muscles of the scapula, specifically the infraspinatus and teres major. Drawn on newsprint with charcoal and conte crayon.

RLiberace Anatomy of Torso wkshop - Robs dwg 4
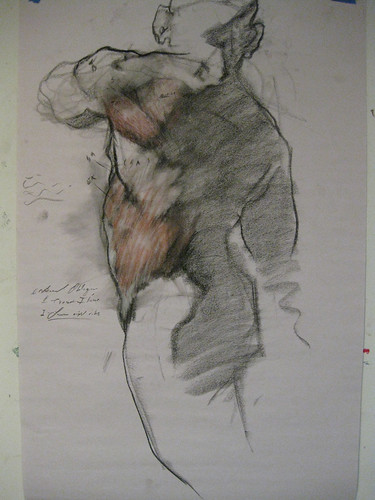
.With this drawing Rob began by focusing on the chest and abdomen muscles first and then laid in the rib cage and clavicle on top of the drawing.

RLiberace Anatomy of Torso wkshop - Robs dwg 5
.Drawn on canson paper with charcoal pencils and white pastel pencil for highlights.

RLiberace Anatomy of Torso wkshop - Robs dwg 6
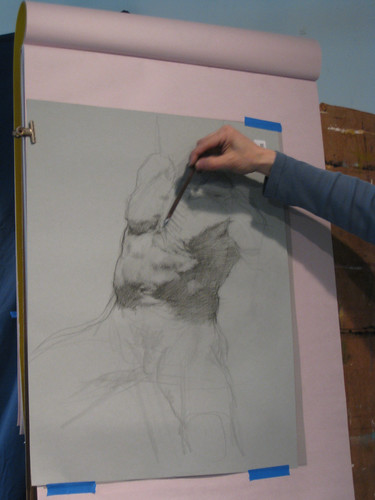
.On the last day we focused on the big back muscles and how they interact with the shoulder muscles. This is the first of three demonstration drawings (though I only got photos of the first two...)

RLiberace Anatomy of Torso wkshop - Robs dwg 7

Here are some of my drawings from the workshop {more are posted on flickr}.

RLiberace Anatomy of Torso wkshop - 1
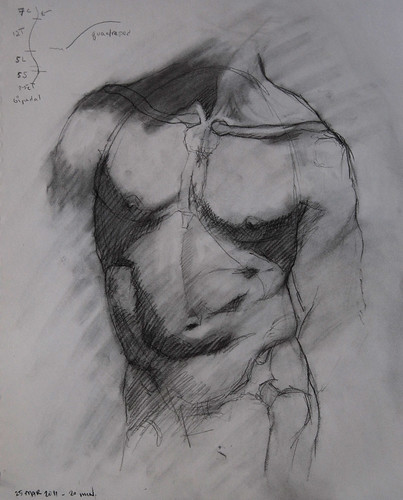
.first drawing of the workshop, a quick analysis of the chest and abdomen with the clavicle and sternum drawn in and the massing for the rib cage outlined. The point where the ninth rib meets the rectus abdominis muscle is an important point when drawing this view of the torso as it helps reinforce the direction of the rib cage. Drawn on white drawing paper and charcoal.

RLiberace Anatomy of Torso wkshop - 2
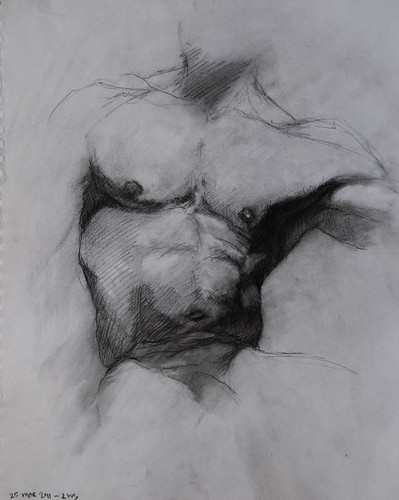
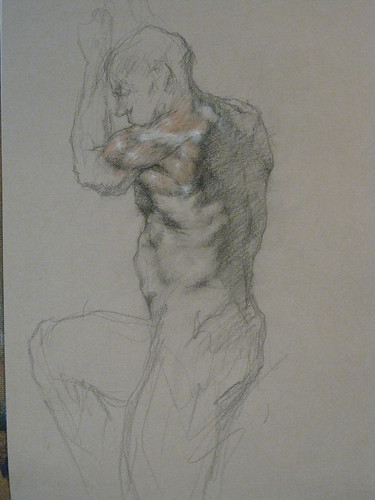
.Another drawing of the front torso, this time leaving out the bone outlines. Drawn on white drawing paper and charcoal.

RLiberace Anatomy of Torso wkshop - 5
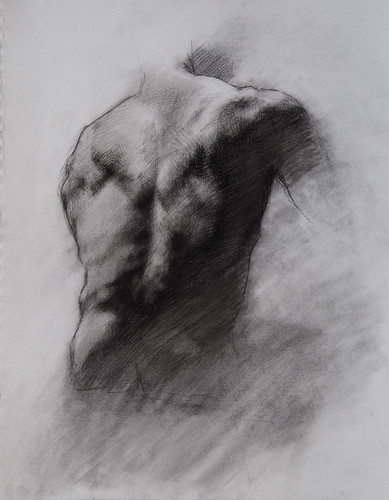
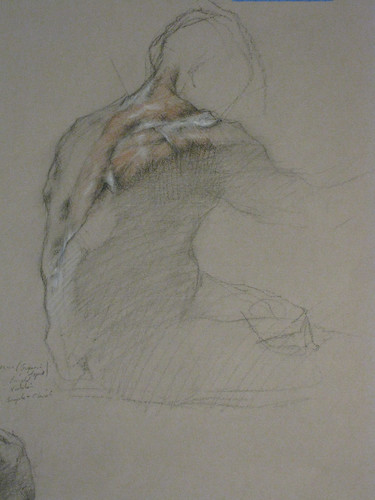
.This is the last drawing completed during the workshop. Drawn on white drawing paper and charcoal.

Working for three days straight was really a wonderful opportunity to learn and apply Rob's recommendations from previous times he had come around critiquing everyone's drawing.

Wednesday, March 23, 2011

Week 2: Young Girl Reading by Jean-Honore Fragonard

IMG_5641
{end of the day in gallery 55}

Hello,

This Monday was my second day working on Young Girl Reading by Fragonard. I started the day laying in layers of burnt umber and wiping away to vary the values. Later as the day went along I started to lay in the yellow of the dress and the lighter tones of the pillow and collar. After lunch I started blocking in the head, re-working it several times and by the end of the day knowing that something was off.

When working on a copy I do not trace or scale using a grid because each time I paint I want to further hone my skills at adjusting for scale and proportion, and my canvas is smaller (28" x 20") than the original painting (approx 32" x 25") so the opportunity to use a direct "sight-size" method when blocking in the painting is not possible. This is okay, because I have ways to learn and figure out where I have gone wrong...

I use photoshop to analyze what is going on...

week 2  - young girl reading analysis
{my copy and the original painting overlayed in photoshop}

From this image it is easy to identify where proportionally things have gone astray. The young girl in my copy is more narrow and tall than the original, in fact with further analysis I realize that her head has become much more elongated, making her look older and more mature.

So next week will probably be all about correcting these issues before moving on and getting more of the painting completed.

Tuesday, March 15, 2011

Week 1: Young Girl Reading by Jean-Honore Fragonard

Week 1: The Beginning
{blank canvas and ready to go}

Hello,

On Monday I was back at the NGA to begin the next copy, which is Jean-Honore Fragonard's Young Girl Reading. Typically I start with a neutral gray ground when beginning a painting, and since I buy rolls of canvas and apply the ground to the entire roll this is what I had available in my studio to begin the painting. However on investigating the original painting I realized that Fragonard painted this painting on a creamy neutral ground.

In this photo of the Fragonard painting you can sort of see the creamy ground of the painting, the thickness of the paint varies with the ground peeping through in many places.

IMG_5614
{the original painting}

The first step was to get my base color correct. I used a mixture of yellow ochre, cremnitz white, and a smidgen of raw umber thinned with oderless mineral spirits (OMS) for this base coat.

Week 1: mid-day
{mid-day status}

After getting the cream ground on I worked at blocking in the image, the goal was for accuracy and proportions. I then left for lunch giving the paint an hour to set up some.

IMG_5621
{end of day status}

After getting back, I reworked some areas adjusting proportion and then I proceded to remove the majority of the burnt umber lines I had placed before lunch. This is because the subsequent layers of paint will be various levels of opacity and I do not want my initial drawing lines to shine through when I am finished with this piece.

I am really looking forward to working on this copy, the brushstrokes are so loose and full of energy, something so very different from the tight control found in the de Heem painting...

Sunday, March 13, 2011

paint brushes
{paint brushes in the studio}

Hello,

With the weekend coming to a close I thought I would stop in and say hi :) Also I want to thank everyone who commented and emailed me about finishing the Vase of Flowers copy, I really appreciate your support and encouragement.

Painting wise this weekend {particularly today} has been a bit of a dud because of being under the weather and not wanting to push it. So instead, I have been surfing the net, knitting some, and reading this bookabout dutch still life.

Here are a few highlights found over the weekend:

.a lovely photo, welcoming spring {a start from wild goose chase's photostream on flickr}

.a new to me art materials forum with expert moderators that provide unbiased and thorough answers to questions posed by artists. Some of my favorite posts: 1. on panel priming, 2. on documenting my art work, and 3. attaching painting to a panel. There are many more topics, so please stop by and check it out some.

Saturday, March 12, 2011

Jonquils {a new small painting}

20110302 jonquils pitcher and bottle 6x6
Still Life with Jonquils, Pitcher, and Bottle
{6" x 6" (15.2 x 15.2 cm) – oil on gessoed masonite panel}  SOLD

Another small floral painting on a gessoed masonite panel to mix things up a bit. I am most comfortable painting on linen, typically oil primed, however I am finding working between a variety of surfaces{linen, gesseod panels, and cotton canvas} has expanded my ability to handle paint. This is because each surface has different properties and by switching between them I can learn what works best on each and then sometimes bring that technique over to a different surface adding textural emphasis where something extra special would strengthen the piece.

Wednesday, March 9, 2011

Finished: Vase of Flowers by Jan Davidsz de Heem

IMG_5594
{My copy of the original painting}

Hello,

This Monday I was able to get to a point in copying the original painting that I consider to be the closest I will ever get to finishing. I know that is a bit long winded, but the point is I got to a place where I was satisfied with the progress made and know that if I continued to refine the copy, it would feed my compulsive personality traits more than helping me learn more about the craft of painting. And this is my ultimate goal with being a copyist at the National Gallery of Art.

Completing this copy took 22 visits to the gallery, typically painting between 10am and 4pm, with a one hour break for lunch and wandering the museum. Along the way I learned to slow down, observe, imagine, and execute. While working on this painting I gained a deeper understanding of how to use glazes and how they build upon each layer, adding to the depth and complexity of the paint surface.

This painting was my first copy as part of the program and I am very glad I chose a painting that was lightyears ahead of me in skill, because it forced me to learn, grow, and adapt. I remember the first two or three visits to the musuem where I seriously questioned if I had made the right decision and if I should cut and run... however once I realized how to go about the process of copying and to be satisfied with only covering a 3" x 3" area of canvas with a developed and refined image each day progress on completing the painting seemed to speed up. I think it was because I no longer wasted time with what was not getting accomplished but instead I would focus more on the present and what was being transformed.

From this experience I learned that it is always a good idea to bite off more than you can chew, because eventually you learn how to make it work out.

IMG_5591
{my copy below the original painting}

details of the original painting:
Vase of Flowers, c. 1660
Jan Davidsz de Heem (artist)
Dutch, 1606 - 1683/1684
oil on canvas
overall: 69.6 x 56.5 cm (27 3/8 x 22 1/4 in.) framed: 90.1 x 77.8 cm (35 1/2 x 30 5/8 in.)
{my copy is 24" x 18" (61 x 45.7 cm)}

Next week I begin a new copy, it is going to be something totally different than this painting in style and subject and I am looking forward to all the challenges it will bring.

Thanks for being part of this experience and I hope you will continue to visit.

Liz

Sunday, March 6, 2011

Current news...

20110128 tulips and apple 8x10
Still Life with Tulips and Apple - SOLD
{8" x 10" (20.3 x 25.4 cm) – Oil on Canvas}

Last year after being part of the Non-member Salmagundi Club Juried Exhibition, I was invited to become a member of the Salmagundi Club. I was honored by the invitation and applied, after waiting for several months I received notice that I had been voted in! This painting is my first submission to be included into one of the many member shows held at the club, the 2nd Annual Sylvia Glesmann Floral Exhibition. The show will be open until March 30th, gallery is open to the public daily from 1pm to 5pm (Sun-Sat) and is located at Forty-Seven Fifth Avenue, New York, NY 10003.

And this painting is part of the Spring Auctions held to support the Salmagundi Club.
20100727 Peaches and Bowl 8x10
Still Life with Peaches and Bowl - SOLD
{8" x 10" (20.3 x 25.4 cm) – Oil on Canvas}

For more information about the auction, please click here.

+++++++++++++++++++++++++++++++++++++++++++++++++++

Another bit of news I have been sitting on is personal...

Lately I have also been a bit distracted searching out items like these...


baby girl slippers...


baby bibs...


cute baby shoes...


This is because I am expecting a little girl in late summer!

My plan is to keep painting and creating everyday, however some aspects of my schedule may change and adapt as the pregnancy moves forward.

Thursday, March 3, 2011

{a new small painting}

20110213 iris bowl and bottle 6x6
Still life with Iris, Bowl, and Bottle
{6" x 6" (15.2 x 15.2 cm) – oil on gessoed masonite panel}  SOLD


This was painted a few weeks ago, I just have been slow to get it photographed.

All these 6x6 paintings have been painted on a gessoed masonite panel with a burnt sienna ground and it has been really fun working with the smooth texture of the panel and the warm ground. I think the warmth really comes through and helps the composition of these pieces because they are dark in tone and cool in temperature. If I started with my standard neutral gray ground the composition may tend to run too cool and thus lose some of the glow that peeps through in places where the paint is thin.